Artificial Turf Drainage Problems and Fixes
Installing artificial turf can be a great option for some homeowners. This type of material requires less maintenance and can be cleaned easily. In this article we cover the main artificial turf drainage problems and how you can fix them.
If you want to avoid rainwater puddles, it’s crucial to lay down a base layer and avoid installing turf over hard surfaces. Let’s take a look at the specific steps you can take to ensure proper drainage.
Why Install Artificial Turf
Having your entire lawn made out of synthetic grass isn’t for everyone. Some people enjoy the look and feel of real grass. But if you spend too much time cutting the lawn, or you have a small yard, artificial turf is the solution.
Artificial Turf Drainage Problems
Installing artificial turf can be a fun do-it-yourself project. But it’s crucial to follow the correct steps to get the job done right. If not, you will certainly have drainage problems in the future.
No Base Layers
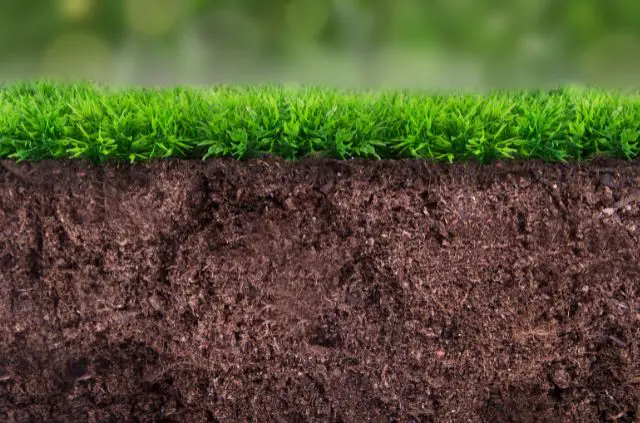
We tend to look at artificial turf as a standalone material. But there are many layers underneath the turf that are just as important and will help with drainage.
There should also be a weed barrier (optional), 1-2 inches of decomposed granite, and 2-3 inches of drain rock. All of this gets installed over the natural soil to help control rainwater.
Lack of Infill
Infill is another important material to include when installing artificial turf. This keeps grass from lying flat, prevents bacteria growth, and helps absorb shock.
Infill does not necessarily help with drainage, but without it puddles will be more noticeable on the turf. There are many different types on infill including sand, rubber, and a rubber/sand mixture.
Installed on a Hard Surface
You also want to avoid installing artificial turf on a hard surface. This problem is similar to lacking a base layer and will certainly cause drainage problems in the future.
Without decomposed granite and drain rock, rainwater will not have anywhere to go. As a result, water will begin to puddle on the surface and it will be very difficult to drain properly.
Bad Quality Turf
Another reason why you might have artificial turf draining problems is from poor quality material. Most high quality artificial grass is manufactured with small holes to allow for drainage.
If these drainage holes are not present on the bottom, rainwater will have no where to go. Even though this issue may be rare, it’s still worth checking when buying artificial turf.
Fixing Artificial Turf Drainage Problems
Unfortunately there’s no one step solution to fixing this problem. You will need to tear out the existing layer and start from square one.
1. Take Out Existing Turf
Begin by removing the existing layer of turf from your lawn. There’s no reason for cutting, as turf usually gets nailed down along the seems, before being stretched out.
All you need to do is remove these nails and roll up the artificial grass neatly. If you plan on buying new turf, you could cut up the material – as there won’t be any need to save it.
2. Remove a Layer of Soil
As we briefly mentioned above, you need to establish a base layer in order for turf to drain. Plan on removing any where from 2-5 inches of soil to make room.
The exact amount really depends on the area you live in. If your lawn has a history of poor drainage, you may need a thicker layer. But if you only have small puddles, a shallow layer will be sufficient.
3. Put Down Drain Rock
After removing enough soil, the next step is to add a layer of drain rock. This will set as the foundational layer for the turf, as it will sit between the soil and decomposed granite.
Some people decide to add wire mesh beneath this rock. This step is optional, but it will prevent the drain rock from shifting over time – but it will also add cost to the project.
4. Add Decomposed Granite
The next layer of rock is called decomposed granite. You can think of of this layer as the thinner material when comparing it do the drain rock. Both types are essential for proper drainage.
This layer doesn’t need to be as thick as the drain rock and around 1-2 inches will work just fine. Make sure to level out this material evenly, before moving on to the next step.
5. Include a Weed Barrier
This step is optional, but it’s something you should consider. No homeowner wants to get on their hands and knees to remove weeds. It takes time and strains your back in the process.
Installing a weed barrier between the base layer and turf can be a life saver. This material doesn’t cost that much money and it doesn’t add that much time to the installation process.
6. Lay Down Turf
Now you can finally lay back down the layer of turf that was removed, or add a new layer. You can now see how rainwater can drain, from the amount of base underneath the turf.
Artificial grass should be installed at the perimeter first. You can nail down the sides and tightly pull it in the other direction. Continue applying nails to make sure there are no wrinkles.
7. Install Infill
The last and final step to this project is to throw down some infill. This can be made out of rubber, sand, or a combination of both. Infill is great at keeping the grass blades in place when walked on.
It will also provide some level of shock absorption – which is better on your knees. This is a very important step, as without infill the grass will lay flat and look unrealistic.
Final Thoughts
Artificial turf draining problems can be a nightmare. The good news is this issue can be fixed in just a few simple steps.
The most important thing is to establish a base layer. This will allow rainwater to drain more efficiently and you won’t have to deal with puddles in the future.
Further Reading
Search Terms
- Artificial turf drainage problems

