Does Vinyl Flooring Fade in The Sun?
There are many different types of flooring that can be found in homes. Vinyl is both durable and cost-effective. But does vinyl flooring fade in the sun?
Unfortunately, vinyl flooring will fade in the sun after prolonged UV exposure. This is most common when a rug gets moved after a few years.
There will be a noticeable difference between the faded vinyl and the area protected by the rug. The only way to fix this problem is to replace the vinyl flooring.
What is Vinyl Flooring?
Vinyl flooring is a type of material made from plastic, used in the interior of homes. It can typically be found in kitchens, bathrooms and other rooms in the house.
The top layer usually comes in a clear, polyurethane coat, which can be waterproof and offer some protection from scratches. Vinyl flooring is not only inexpensive, but it’s also easy to install.
Some flooring is even designed to resemble hardwood. Another useful feature about vinyl flooring is that it’s a good material for heavy traffic areas. It can be bought in sheets, planks, or tiles.
Does Vinyl Flooring Fade in The Sun?
As we briefly mentioned in the sections above, vinyl flooring can fade in the sun. Exposure to sunlight can cause colors to fade on vinyl, wood, carpets, and many other household materials.
Over time sunlight will eventually bleach color pigments from the vinyl. If this happens evenly you might not notice a change at first. However, problems arise when homeowners start to move furniture.
Take a rug for example. If you have a small rug underneath your kitchen table, that area of the floor is protected from sunlight. But when the rug gets moved, there will be a clear contrast between faded and protected vinyl.
Is Vinyl Flooring UV Resistant?
You might come across some types of vinyl flooring labeled as UV resistant. However, it’s difficult to prove how long certain vinyl materials and coatings will last for.
That’s why it’s critical to do your research before buying. Some vinyl might be UV resistant for 3-5 years, while others might not offer any protection. But there are also other factors that will impact this time range.
The biggest thing comes down to use. If your floor gets heavy foot traffic, the UV protective layer will wear down quicker. Once exposed, the surface will have nothing to shield it from the sunlight.
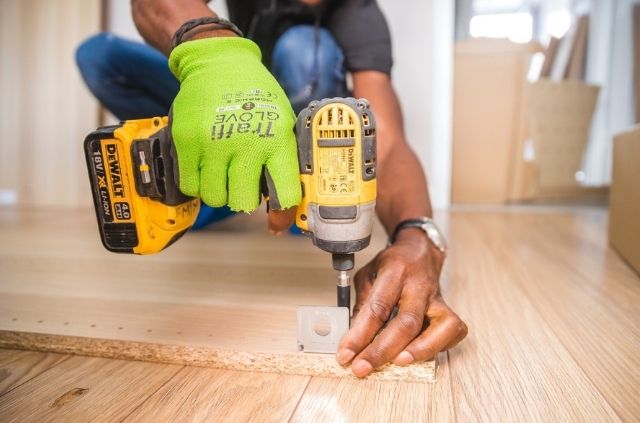
How to Remove Vinyl Flooring
Removing vinyl flooring can be a great project to do on your own. You’ll need to follow all of the steps listed below, in order to correctly install sheets, planks, or tile flooring.
1. Safety First
It was common for homes built before 1980 to have asbestos vinyl flooring. If you are planning on removing your original flooring (older than 1980), it’s necessary to hire a licensed professional.
This is a hazardous project and it’s much safer to have it done by a qualified contractor. There is a way to install new flooring, without removing the original. But it cannot be damaged in anyway.
2. Move Furniture
It’s going to be near impossible to install a new floor without moving furniture out of the room. This includes tables, chairs, and anything else that will get in your way during the process.
You may not need to move dishwashers, as no one will be able to see underneath them. But it’s a good idea to move large items like refrigerators, as these can get replaced in the future.
3. Remove Baseboards
All types of flooring need to make contact with the wall and baseboards will prevent you from doing this. Even though they cover a small edge of the vinyl, baseboards should be taken off beforehand.
You can safely do this by using a prybar and rubber mallet. Place one end of the prybar where the baseboard meets the wall. Gently hit the top of the prybar to create space needed to remove the board.
4. Remove the Floor
Assuming your vinyl is newer than 1980, the next step is to remove the original floor. It’s easier to start in the middle first, as most flooring is typically only glued around the perimeter edges.
Use a utility knife to make cuts in the middle of the floor. Creating narrow strips (around 12″ in length) will make the removal process easier. You can also use a scraper tool to further loosen the vinyl from the floor.
5. Clean Remaining Glue
Even after all of the vinyl flooring has been removed, there will still be some glue leftover. You can remove these stubborn pieces by using the prybar and gently hitting the glue with a hammer.
If the glue still doesn’t come off you will need to use a floor scraper. This is a helpful tool that will clean up the remaining pieces. Just make sure not to apply too much force, as this could damage the floor.
6. Use Water and Heat
You might notice that some areas with glue will be easier to remove than others. Try using warm water and soap, to soak surfaces where the adhesive won’t come off. This should do the trick.
If not, you can also use a heat gun. Hold the heat gun up close to the glue, so it will loosen. If you hold it long enough it will make the glue much easier to remove when using a scraper tool.
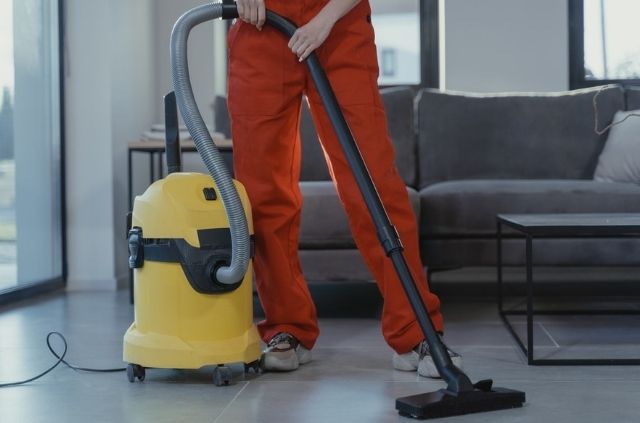
7. Clean Up
There might be a mess on the floor after you have removed the vinyl pieces. Use a broom to sweep up big pieces and follow up with a shop vac. You can also use a shop vac on wet areas.
The most important thing is getting the floor as clean as possible, before installing a new layer. Any contaminants left on the surface will get covered with a new floor and could create uneven sections.
Wrapping Up
By now we should have provided an answer to the following question: does vinyl flooring fade in the sun? Vinyl flooring will fade in direct sunlight, no matter how good you take care of the material.
You want to avoid moving a rug that has been sitting on the floor for years. This will create a contrast and it will make things worse when looking at faded sections and vinyl that has been protected.
Search Terms
- Does vinyl flooring fade in the sun?
- How to replace vinyl flooring